Add New Contract
To add a new contract, there are three methods available, each leading to the New Contract Form.
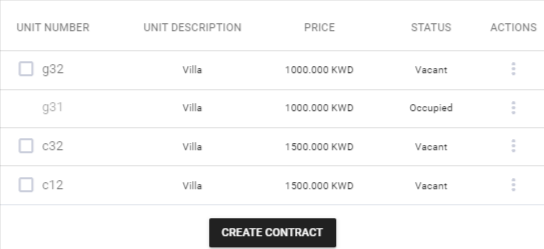
From Property Management
From the Property Management section, each property is listed with details such as address, number of contracts, units, rented units, and available units. Click on the dropdown arrow to expand the property.

A dropdown list of units related to the property is displayed along with their full details. After selecting the available units for renting, click the CREATE CONTRACT button at the bottom of the unit dropdown list to be redirected to the New Contract Form.
From Tenant Row
Within the Tenant & Contract Dashboard, click the three dots (...) beside the tenant's name and select New Contract. You will be redirected to the New Contract Form.

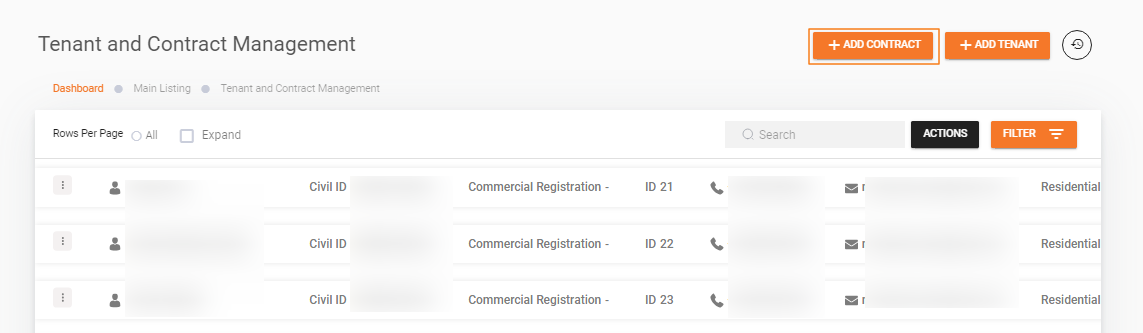
From Tenant and Contract Management
Navigate to the Tenant & Contract Management section and click the Add Contract button to be redirected to the New Contract Form.
Creating a contract from the Property Management list is the recommended method, as it provides all the necessary information about the property and available units.
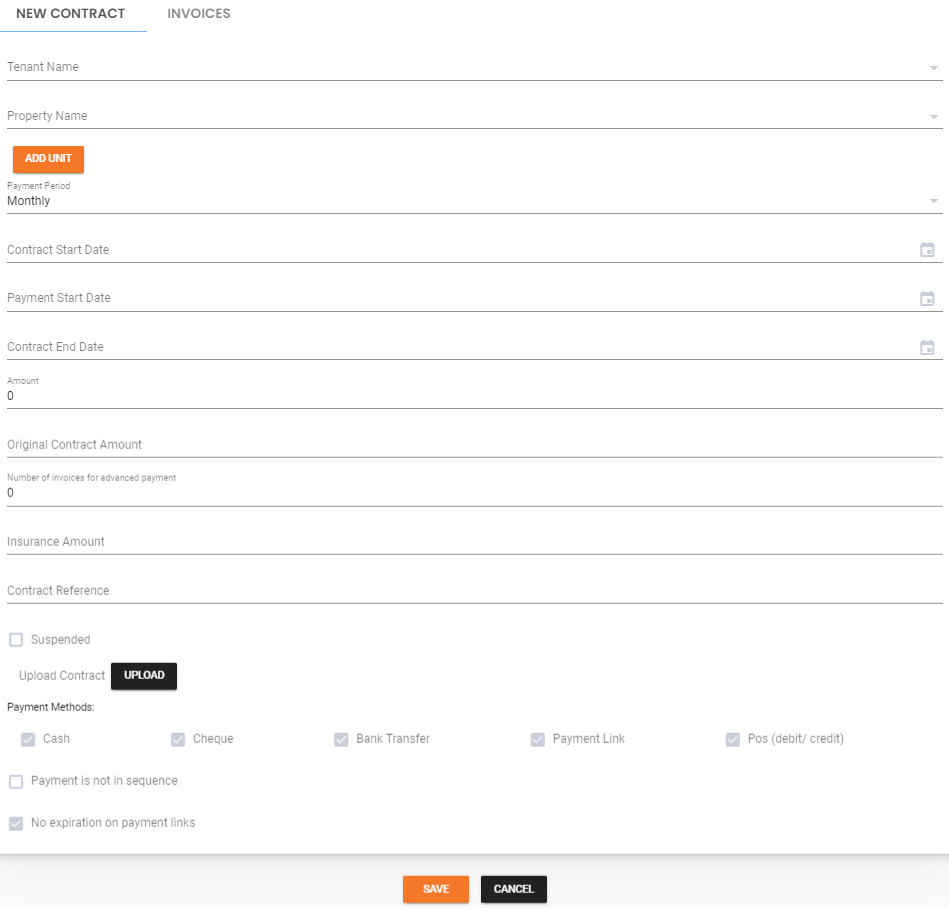
New Contract Form
After following one of the three methods above, fill out the following fields:
| Field | Description |
|---|---|
| Tenant Name | Name of the tenant associated with the contract |
| Property Name | Name of the property related to the contract |
| ADD UNIT | Click to add units to the contract. Provide: Unit Number (ID or code), Unit Type (auto-filled after choosing unit number), Amount (auto-filled after selecting unit number) |
| Payment Period | Frequency of rent payments: Monthly, Quarterly, Semi-annually, or Annually |
| Contract Start Date | Start date of the contract |
| Payment Start Date | Start date for rent payments |
| Contract End Date | End date of the contract |
| Amount | Rent amount, auto-calculated based on the payment period and unit price. Can be modified if necessary |
| Original Contract Amount | The maximum amount the merchant can request per payment period |
| Number of Invoices for Advanced Payment | Total number of invoices issued for advance rent payments, marked as paid during the contracting process |
| Insurance Amount | Amount of insurance associated with the unit |
| Contract Reference | Reference number or code for the contract |
| Suspended | Whether the contract is suspended (check or uncheck) |
| Upload Contract | Option to upload the contract document |
| Payment Methods | Accepted payment methods: Cash, Cheque, Bank Transfer, Payment Link, POS (Debit or Credit) |
The difference between the Contract Start Date and the Payment Start Date is considered the grace period.
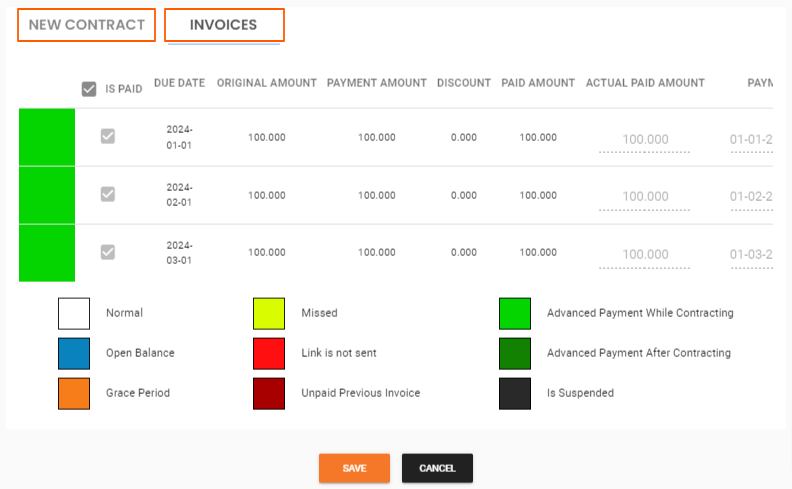
To view advance payment invoices created during contracting, click the second tab in the contract view.
Suspended Contracts
When the Suspended checkbox is checked:
- All generated invoices related to this contract are suspended -- no payment links will be created for these invoices.
- Tenants will not be able to pay these invoices online; payment must be coordinated through legal proceedings.
Merchants can suspend or unsuspend any invoice at any time by navigating to the Tenant & Contract Dashboard, selecting the appropriate tenant and contract, and using the dropdown arrow at the end of the contract row.
To exclude the "Payment Link" option from the payment methods, simply uncheck it from the available options.
Ottu empowers merchants to perform various actions on contracts after creation. For more information, see the Contract Management page.
What's Next?
- Contract Management -- Manage the full contract lifecycle
- Generate Invoice -- Create invoices for the new contract
- Renew Contract -- Extend a contract when it nears expiration