ios
The Checkout SDK is a Swift framework (library) provided by Ottu, designed to facilitate the seamless integration of an Ottu-powered checkout process into iOS applications.
With the Checkout SDK, both the visual appearance and the forms of payment available during the checkout process can be fully customized.
To integrate the Checkout SDK, the library must be included in the iOS application and initialized with the following parameters:
Additionally, optional configurations such as the forms of payment to accept and the theme styling for the checkout interface can be specified.
API private key should never be used on the client side. Instead, API public key should be used. This is essential to ensure the security of your application and the protection of sensitive data.
This video walks you step-by-step through the iOS SDK integration process. Watch it to quickly understand setup, configuration, and key features in action.
Installation
Prerequisites
Before integrating the Checkout SDK, please review the following requirements:
Apple Pay Project Settings
If your app should support Apple Pay:
- Enable Apple Pay capability in:
Xcode > Targets > Signing & Capabilities - Add Apple Pay Merchant IDs (MID) in project settings
iOS Supported Versions
- Since the minimum supported iOS version is 14, the primary demo application is implemented using UIKit framework (SwiftUI is recommended starting from iOS 15).
ottu-ios/Example at main · ottuco/ottu-ios - However, there's also a minimalistic SwiftUI-based demo app:
ottu-ios/Example_SwiftUI at main · ottuco/ottu-ios
Swift Package Manager
Add Ottu SDK as a dependency in Package.swift:
dependencies: [
    .package(url: "https://github.com/ottuco/ottu-ios.git", from: "2.1.10")
]
Or in Xcode:
- Open your project
- Go to Project > Targets > Package Dependencies
- Add
ottu-iosas a dependency
CocoaPods
Add the following line to your Podfile:
pod 'ottu_checkout_sdk', :git => 'https://github.com/ottuco/ottu-ios.git', :tag => '2.1.10'
Run:
pod install
When ottu_checkout_sdk is added to the Podfile, the GitHub repository must also be specified as follows:
pod 'ottu_checkout_sdk', :git => 'https://github.com/ottuco/ottu-ios'
If you see "could not find compatible versions for pod", run:
pod repo update
Initialization
Checkout.init
The Checkout.init function is responsible for initializing the checkout process and configuring the necessary settings for the Checkout SDK.
It must be called once by the parent application and provided with a set of configuration fields that define all the required options for the checkout process.
When Checkout.init is invoked, the SDK automatically sets up the essential components, including:
- Generating a form for the customer to enter their payment details.
- Handling communication with Ottu's servers to process the payment.
This function returns a View object, which is a native iOS UI component. It can be embedded within any ViewController instance in the application.
Integration Guide
Once the SDK is installed (via Swift Package Manager or CocoaPods), follow these steps to integrate it into your app.
- Import the SDK
In your
ViewController.swift(or any file responsible for presenting the SDK):import ottu_checkout_sdk - Conform to
OttuDelegateYour view controller must implement theOttuDelegateprotocol:class ViewController: UIViewController, OttuDelegate - Declare a Checkout MemberInside your
ViewController:private var checkout: Checkout? - Initialize CheckoutInside
viewDidLoad, initialize the Checkout SDK:Required parametersdo {
self.checkout = try Checkout(
displaySettings: PaymentOptionsDisplaySettings(
mode: PaymentOptionsDisplaySettings.PaymentOptionsDisplayMode.list,
),
sessionId: sessionId,
merchantId: merchantId,
apiKey: apiKey,
delegate: self
)
} catch let error as LocalizedError {
print(error)
return
} catch {
print("Unexpected error: \\(error)")
return
}sessionId→ ID of the created transactionmerchantId→ Same as the domain address in API requestsapiKey→ Public API key for authorizationdelegate→ Callback listener (usuallyself)
formsOfPayment→ Defines available payment methodssetupPreload→ Preloads transaction details for faster initialization
setupPreloadcomes from the transaction creation response.
Passing it prevents the SDK from re-fetching transaction details, reducing initialization time by several seconds. It is a decoded JSON object to aTransactionDetailsobject.
See an example: MainViewController.swiftThe simplest version of the initialization looks like this:
do {
    self.checkout =
        try Checkout(
            sessionId: sessionId,
            merchantId: merchantId,
            apiKey: apiKey,
            delegate: self
        )
} catch
let error as LocalizedError {
    // display an error here
    return
} catch {
    print("Unexpected error: \\(error)")
    return
} - Add the Payment ViewStill inside
viewDidLoad, embed the payment view into your container:if let paymentVC = self.checkout?.paymentViewController(),
let paymentView = paymentVC.view {
self.addChild(paymentVC)
paymentVC.didMove(toParent: self)
view.addSubview(paymentView)
}
This is a basic example that adds the Checkout view without handling dimensions.
For proper layout with constraints, refer to the demo app: OttuPaymentsViewController.swift
Properties
Required Properties
merchantId string required
The merchant_id specifies the Ottu merchant domain and must be set to the root domain of the Ottu account, excluding the "https://" or "http://" prefix.
For example, if the Ottu URL is https://example.ottu.com, then the corresponding merchant_id is example.ottu.com.
This parameter is used to link the checkout process to the appropriate Ottu merchant account.
apiKey string required
The apiKey is the Ottu API public key, used for authentication when communicating with Ottu's servers during the checkout process.
Only the public key should be used. The private key must remain confidential at all times and must not be shared with any clients.
sessionId string required
The session_id is a unique identifier assigned to the payment transaction associated with the checkout process.
This identifier is automatically generated when the payment transaction is created.
For more details on how to use the session_id parameter in the Checkout API, refer to the session_id.
delegate object required
An object is used to provide SDK callbacks to the application. Typically, this is the parent app's class that conforms to OttuDelegate, aggregating the SDK object.
To implement this delegate, the class must define three callback functions. More details are accessible next secion.
Display Options
formsOfPayment array optional
The forms of payment displayed in the checkout process can be customized using formsOfPayment. By default, all forms of payment are enabled.
Available options for formsOfPayment:
applePay: Supports Apple Pay, allowing purchases to be made using Apple Pay-enabled devices.stcPay: Requires customers to enter their mobile number and authenticate with an OTP sent to their device to complete the payment.cardOnsite: Enables direct payments (onsite checkout), where Cardholder Data (CHD) is entered directly in the SDK. If 3DS authentication is required, a payment provider is involved in the process.tokenPay: Uses tokenization to securely store and process customers' payment information.redirect: Redirects customers to an external payment gateway or a third-party payment processor to complete the transaction.
displaySettings object optional
The display of payment options is configured using the PaymentOptionsDisplaySettings struct. Additional information is provided in the Payment Options Display Mode section.
Payment Options Display Mode
The payment options display can be adjusted using the SDK with the following settings:
mode(BottomSheetorList)visibleItemsCount(default is 5)defaultSelectedPgCode(default is empty)
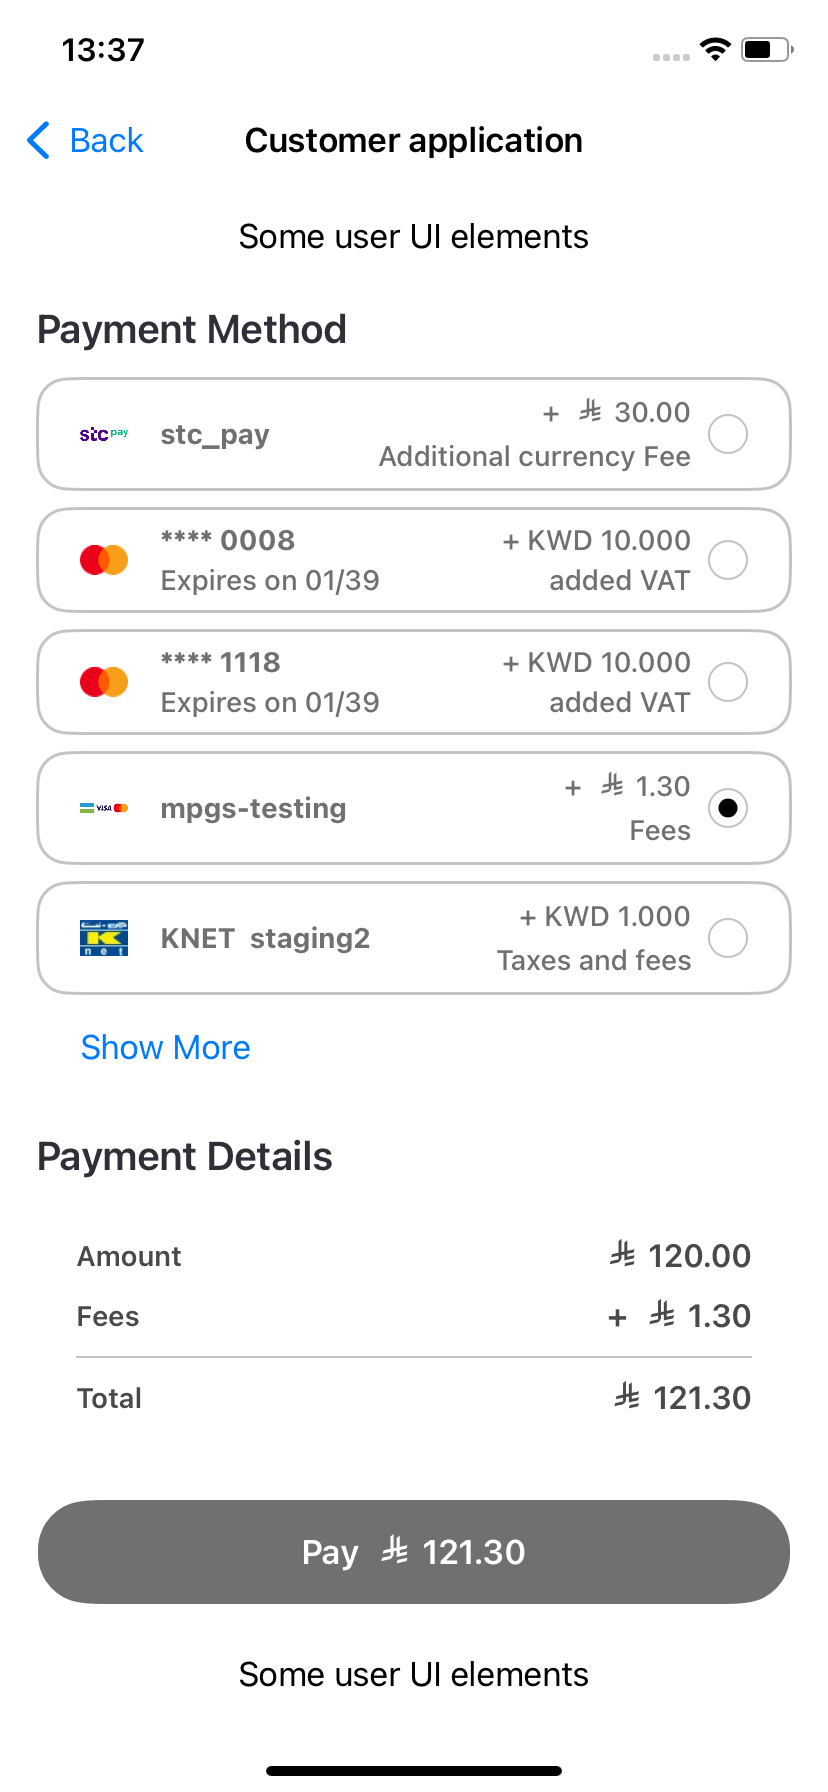
By default, BottomSheet mode is used, as set in previous releases. List mode is a new option, where a list of payment methods is displayed above the Payment Details section and the Pay button.
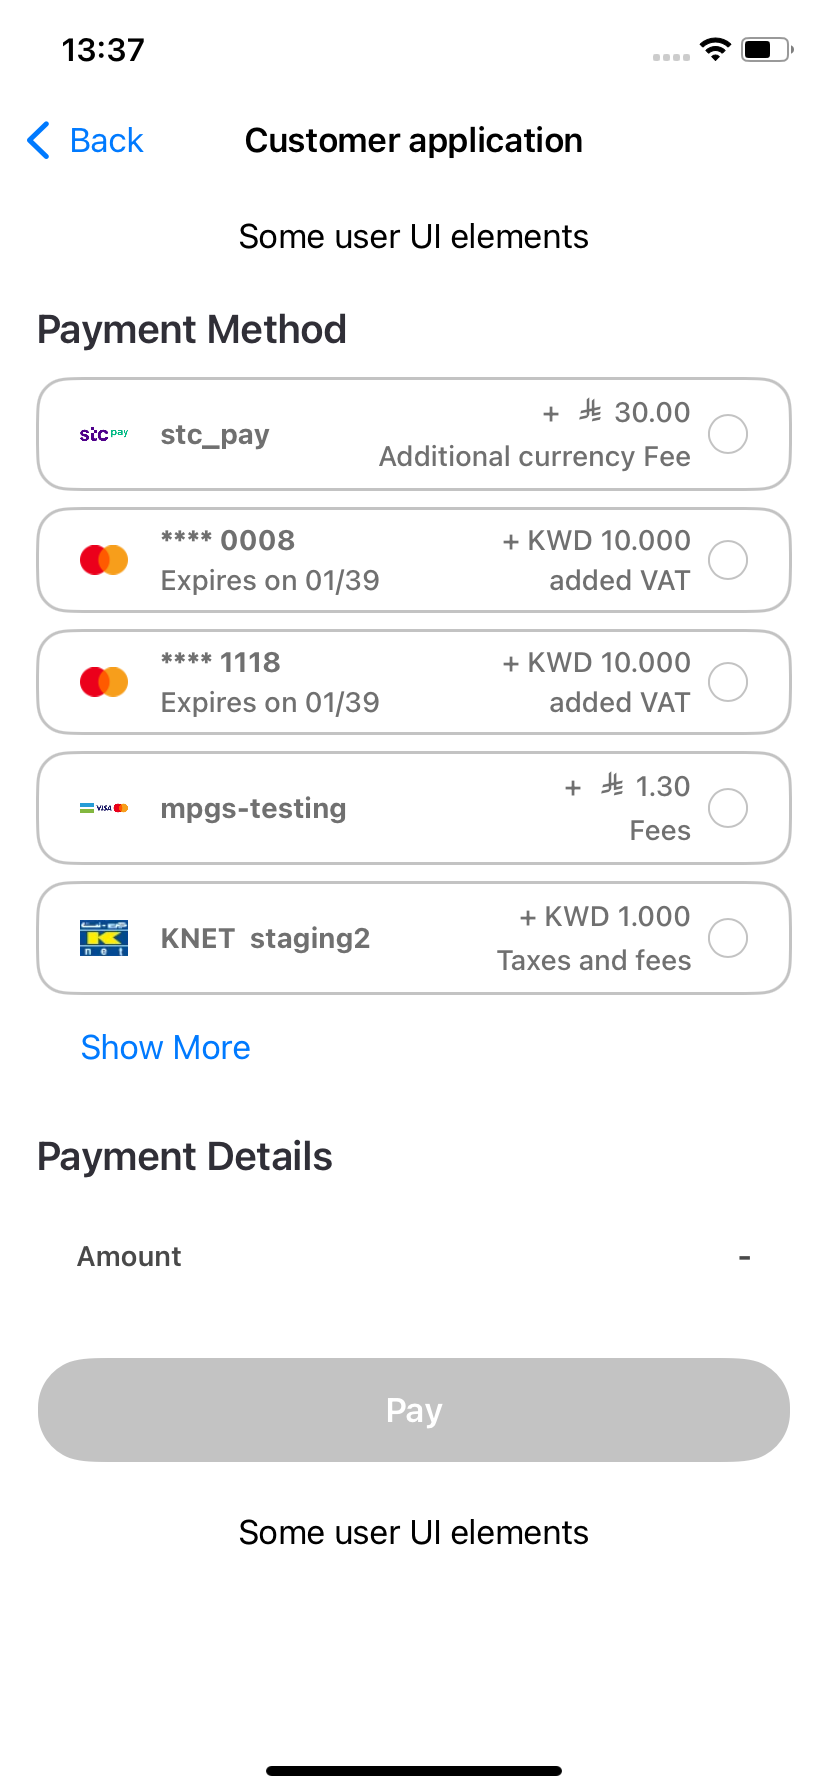
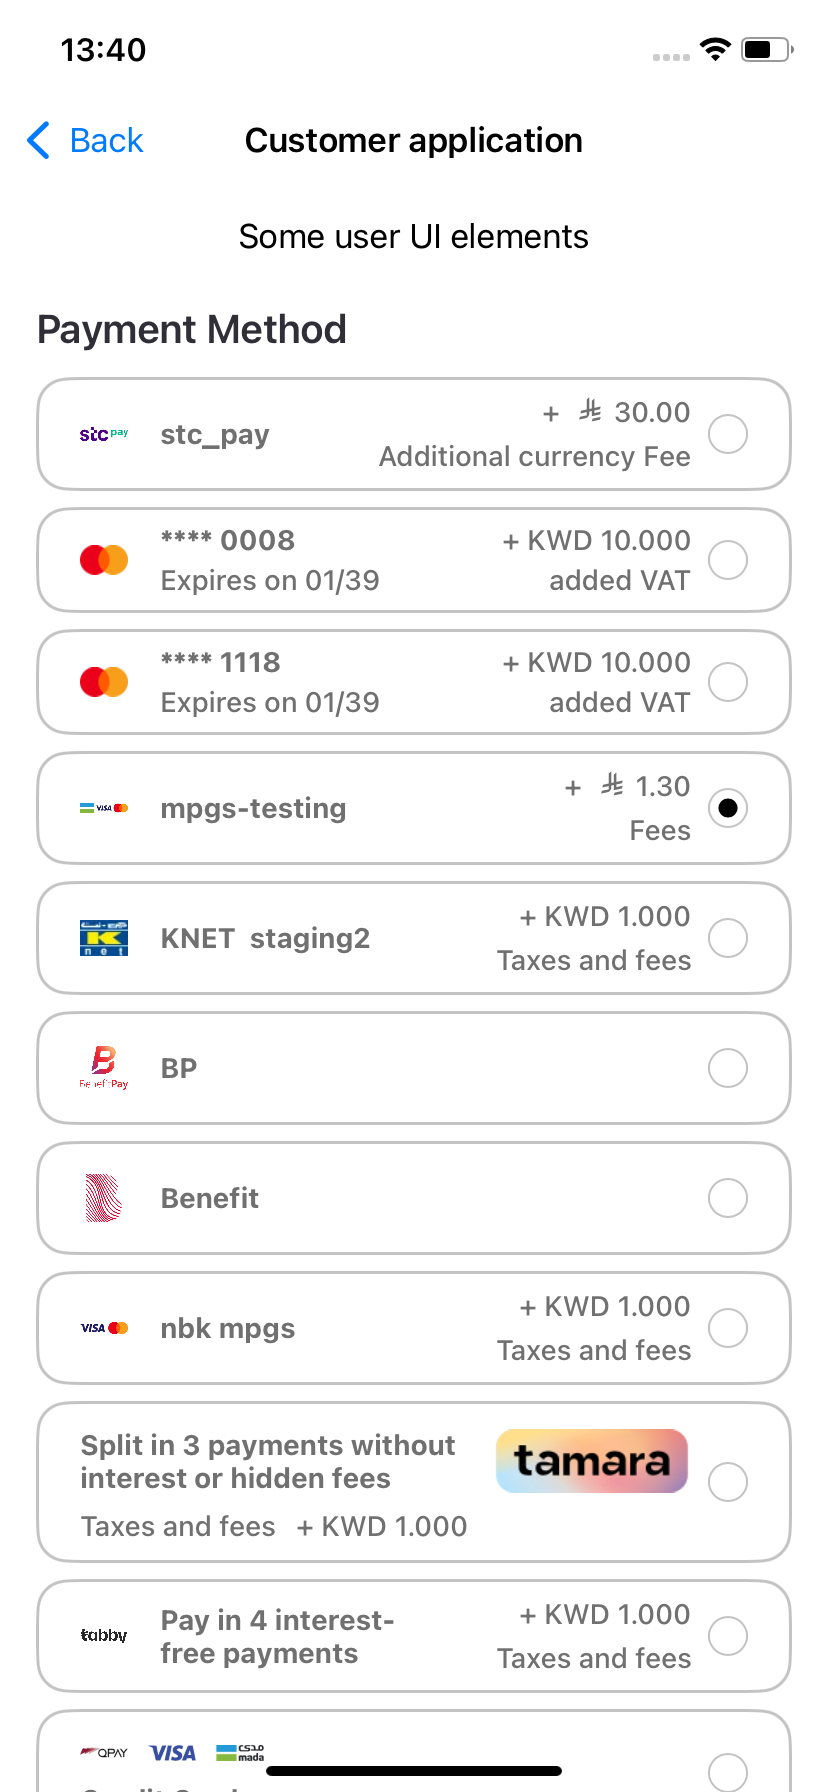
visibleItemsCountis an unsigned integer that sets how many payment options are shown at once. It only works in List mode. If there are fewer options than the number set, the list height will adjust to show only the available options.
If 0 is set, the SDK will throw an exception that the parent app must handle.
defaultSelectedPgCodeis a payment gateway (PG) code that will be automatically selected. The SDK will look for the matching payment option and select it if found. If not found, no payment option will be selected.
If there are many payment options, the total height of the payment list, the Payment Details section, and the Pay button may exceed the screen size. The SDK doesn't support vertical scrolling, so the parent app must handle it. You can refer to the demo app's source code for guidance.
All these parameters are optional and can be passed to Checkout.init through the following object:
displaySettings: PaymentOptionsDisplaySettings(
  mode: paymentOptionsDisplayMode,
  visibleItemsCount: visibleItemsCount,
  defaultSelectedPgCode: defaultSelectedPgCode
)
To view the full function call, please refer to the Ottu SDK - iOS | Example chapter in the documentation. This section provides the complete example, including how the function is used in the context of the Ottu SDK.
Preloading
setupPreload object optional
An ApiTransactionDetails struct object is used to store transaction details.
If provided, the SDK will not request transaction details from the backend, reducing processing time and improving efficiency.
Theme
theme object optional
The Theme struct object is used for UI customization, allowing modifications to background colors, text colors, and fonts for various components. It supports customization for both light and dark device modes. All fields in the Theme struct are optional. If a theme is not provided, the default UI settings will be applied.
The main class describing theme is called CheckoutTheme.
It uses additional component classes like:
ButtonComponentLabelComponentTextFieldComponent
The CheckoutTheme class consists of objects that define various UI components. While the names of these components largely correspond to those listed here, they also include platform-specific fields for further customization.
Properties Description
All properties in the CheckoutTheme class are optional, allowing users to customize any of them as needed.
If a property is not specified, the default value (as defined in the Figma design here) will be automatically applied.
Texts
General
| Property Name | Description | Data Type |
|---|---|---|
mainTitle | Font and color for all "Captions" | LabelComponent |
title | Font and color for payment options in the list | LabelComponent |
subtitle | Font and color for payment options details (like expiration date) | LabelComponent |
Fees
| Property Name | Description | Data Type |
|---|---|---|
feesTitle | Font and color of fees value in the payment options list | LabelComponent |
feesSubtitle | Font and color of fees description in the payment options list | LabelComponent |
Data
| Property Name | Description | Data Type |
|---|---|---|
dataLabel | Font and color of payment details fields (like "Amount") | LabelComponent |
dataValue | Font and color of payment details values | LabelComponent |
Other
| Property Name | Description | Data Type |
|---|---|---|
errorMessageText | Font and color of error message text in pop-ups | LabelComponent |
selectPaymentMethodTitleLabel | The text of "Select Payment Method" in the bottom sheet header | LabelComponent |
Text Fields
| Property Name | Description | Data Type |
|---|---|---|
inputTextField | Font and color of text in any input field (including disabled state) | TextFieldComponent |
Colors
| Property Name | Description | Data Type |
|---|---|---|
backgroundColor | The main background of the SDK view component | UIColor |
backgroundColorModal | The background of any modal window | UIColor |
iconColor | The color of the icon of the payment | UIColor |
paymentItemBackgroundColor | The background of an item in payment options list | UIColor |
selectPaymentMethodTitleBackgroundColor | The background of the "Select Payment Method" bottom sheet header | UIColor |
Buttons
| Property Name | Description | Data Type |
|---|---|---|
button | Background, text color and font for any button | ButtonComponent |
selectorButton | Background, text color and font for payment item selection button | ButtonComponent |
Switch
| Property Name | Description | Data Type |
|---|---|---|
switchOnTintColor | The color of switch (toggle) control | UIColor |
Margins
| Property Name | Description | Data Type |
|---|---|---|
| margins | Top, left, bottom and right margins between compone | UIEdgeInsets |
Payment Details
| Property Name | Description | Data Type |
|---|---|---|
showPaymentDetails | Boolean variable determining whether the "Payment Details" section should be displayed or hidden. | Boolean |
Data Types Description
LabelComponent
| Property Name | Data Type |
|---|---|
color | UIColor |
font | UIFont |
fontFamily | String |
TextFieldComponent
| Property Name | Data Type |
|---|---|
label | LabelComponent |
text | LabelComponent |
backgroundColor | UIColor |
ButtonComponent
| Property Name | Data Type |
|---|---|
enabledTitleColor | UIColor |
disabledTitleColor | UIColor |
font | UIFont |
enabledBackgroundColor | UIColor |
disabledBackgroundColor | UIColor |
fontFamily | String |
UIEdgeInsets
| Property Name | Data Type |
|---|---|
left | Int |
top | Int |
right | Int |
bottom | Int |
Theme Example
To configure the theme, similar steps must be followed as described in the test app file.
Code Snippet:
func createTheme() - > CheckoutTheme {
    var theme = CheckoutTheme()
    theme.backgroundColor = .systemBackground
    theme.backgroundColorModal = .secondarySystemBackground
    theme.margins = UIEdgeInsets(top: 8, left: 2, bottom: 8, right: 2)
    theme.mainTitle.color = .label
    theme.mainTitle.fontFamily = "Arial"
    theme.button.enabledTitleColor = .payButtonTitle
    theme.button.disabledTitleColor = .payButtonDisabledTitle
    theme.button.fontFamily = "Arial"
    theme.button.enabledBackgroundColor = .payButtonBackground
    theme.button.disabledBackgroundColor = .payButtonDisabledBackground
    return theme
}
The theme object is passed to the SDK initialization as shown below:
Code Snippet:
self.checkout = Checkout(
    theme: theme,
    sessionId: sessionId,
    merchantId: merchantId,
    apiKey: apiKey,
    delegate: self
)
SDK Configuration
Language
The SDK supports two languages: English and Arabic, with English set as the default.
The language applied in the device settings is automatically used by the SDK, requiring no manual adjustments within the application.
However, if the transaction is created in a different language and setup preload is enabled, texts retrieved from the backend (such as fee descriptions) will be displayed in the transaction language rather than the device's language.
Therefore, the currently selected device language or the app's selected language should be considered when specifying a language code in the transaction creation request of the Checkout API.
Light and dark theme
The SDK also supports UI adjustments based on the device's theme settings (light or dark mode).
The appropriate theme is applied automatically during SDK initialization, aligning with the device's settings. Similar to language settings, no manual adjustments are required within the application.
Wallet Configuration
Apple Pay
When the integration between Ottu and Apple for Apple Pay is completed, the necessary checks to display the Apple Pay button are handled automatically by the Checkout SDK.
- Initialization: Upon initialization of the Checkout SDK with the provided session_id and payment gateway codes (pg_codes), several conditions are automatically verified:
- It is confirmed that a
session_idandpg_codesassociated with the Apple Pay Payment Service have been supplied. - It is ensured that the customer is using an Apple device that supports Apple Pay. If the device is not supported, the button will not be shown, and an error message stating
This device doesn't support Apple Paywill be displayed to inform the user of the compatibility issue. - It is verified that the customer has a wallet configured on their Apple Pay device. if the wallet is not configured (i.e., no payment cards are added), the Setup button will appear. Clicking on this button will prompt the Apple Pay wallet on the user's device to open, allowing them to configure it by adding payment cards.
- It is confirmed that a
- Displaying the Apple Pay Button: If all these conditions are met, the Apple Pay button is displayed and made available for use in the checkout flow.
- Restricting Payment Options: To display only the Apple Pay button,
applePayshould be passed within theformsOfPaymentparameter. TheformsOfPaymentproperty instructs the Checkout SDK to render only the Apple Pay button. If this property is not included, all available payment options are rendered by the SDK.
This setup ensures a seamless integration and user experience, allowing customers to easily set up and use Apple Pay during the checkout process.
KNET Integration
Due to compliance requirements, KNET necessitates a popup displaying the payment result after each failed payment. This functionality is available only in the cancelCallback when there is a response from the payment gateway. As a result, the user must click on the Apple Pay button again to retry the payment.
The popup notification requirement is specific to the KNET payment gateway. Other payment gateways may have different requirements or notification mechanisms, so it is essential to follow the respective documentation for each payment gateway integration.
To properly handle the popup notification for KNET, the following code snippet should be implemented into your payment processing flow:
func cancelCallback(_ data: [String: Any] ? ) {
    var message = ""

    if let paymentGatewayInfo = data ? ["payment_gateway_info"] as ? [String: Any],
        let pgName = paymentGatewayInfo["pg_name"] as ? String,
            pgName == "kpay" {
                message = paymentGatewayInfo["pg_response"].debugDescription
            } else {
                message = data?.debugDescription ?? ""
            }

    navigationController?.popViewController(animated: true)
    let alert = UIAlertController(title: "Canсel", message: message, preferredStyle: .alert)
    alert.addAction(UIAlertAction(title: "OK", style: .cancel))
    self.present(alert, animated: true)
}
}
The above code performs the following checks and actions:
- Verification: It first checks if the cancel object contains information about the payment gateway
payment_gateway_info. - Payment Gateway Identification: It then verifies if the
pg_nameproperty inpayment_gateway_infois equal to "kpay", confirming that the payment gateway used is KNET. - Response Handling: If the conditions are met, it retrieves the payment gateway's response from the
pg_responseproperty. If not available, it uses a default "Payment was cancelled." error message. - Popup Notification: Finally, it displays the error message in a popup using
self.present(alert, animated: true)to notify the user about the failed payment.
This setup ensures compliance with KNET's requirements and provides a clear user experience for handling failed payments.
STC Pay
When the integration between Ottu and STC Pay is completed, the necessary checks to display the STC Pay button are handled seamlessly by the Checkout SDK.
Initialization: Upon initialization of the Checkout SDK with the provided session_id and payment gateway codes (pg_codes), several conditions are automatically verified:
- It is confirmed that the
session_idandpg_codesprovided during SDK initialization are associated with the STC Pay Payment Service. This ensures that the STC Pay option is available for the customer to choose as a payment method. - It is ensured that the STC Pay button is displayed by the iOS SDK, regardless of whether the customer has provided a mobile number while creating the transaction.
This setup ensures a seamless integration and user experience, allowing customers to easily set up and use STC Pay during the checkout process.
Onsite Checkout
This payment option enables direct payments through the mobile SDK. The SDK provides a user interface where the Cardholder Data (CHD) is entered by the user. If permitted by the backend, the card can be tokenized and saved for future payments.
Below is an example of how the onsite checkout screen appears:
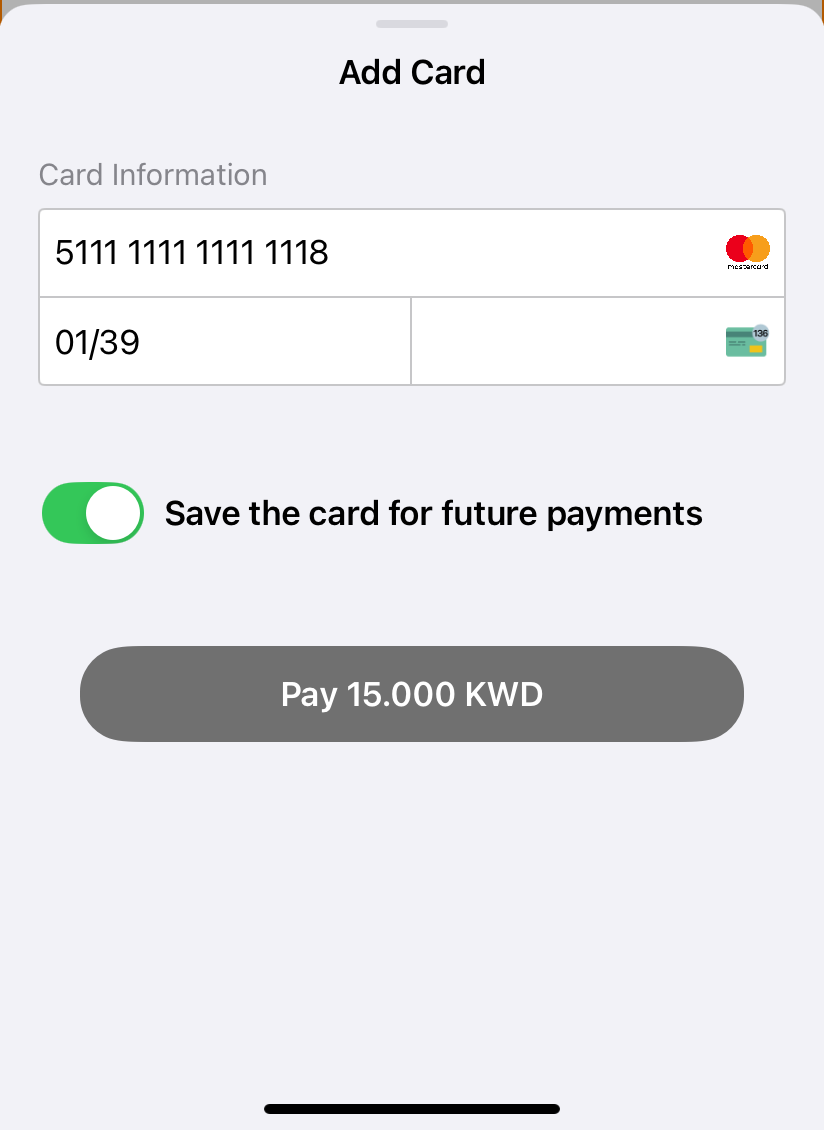
The SDK supports multiple instances of onsite checkout payments. Therefore, for each payment method with a PG code of ottu_pg, the card form (as described above) will be displayed.
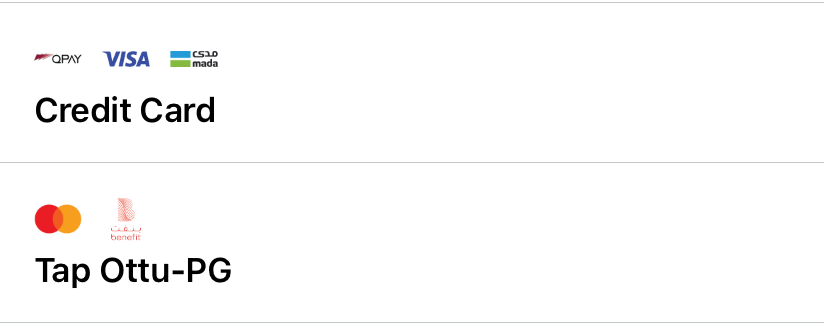
Fees are not shown for onsite checkout instances because the system supports payments through multiple cards (omni PG). The multiple payment icons indicate the availability of different card options.
Callbacks
In the Checkout SDK, callback functions are essential for providing real-time updates on the status of payment transactions.
These callbacks improve the user experience by enabling seamless and efficient handling of different payment scenarios, including:
- Successful payments
- Transaction cancellations
- Errors encountered during the payment process
All the callbacks described below can be triggered for any type of payment.
errorCallback
The errorCallback function is triggered when an issue occurs during the payment process. Proper error handling is essential to ensure a smooth user experience.
Best Practice for Handling Errors
In the event of an error, the recommended approach is to restart the checkout process by generating a new session_id through the Checkout API.
Defining the errorCallback Function
The errorCallback function can be defined using the data-error attribute on the Checkout script tag. This attribute allows the specification of a global function to handle errors.
When an error occurs, the errorCallback function is invoked with a data JSON object, where data.status is set to error.
Params Available in data JSONObject for errorCallback
messagemandatoryform_of_paymentmandatorystatusmandatorychallenge_occurredoptionalsession_idoptionalorder_nooptionalreference_numberoptional
cancelCallback
The cancelCallback function in the Checkout SDK is triggered when a payment is canceled.
Defining the cancelCallback Function
The cancelCallback function can be defined using the data-cancel attribute on the Checkout script tag. This attribute allows the specification of a global function to handle cancellations.
Invocation of cancelCallback
If a customer cancels a payment, the cancelCallback function is invoked with a data JSON object, where data.status is set to canceled.
Params Available in data JSONObject for cancelCallback
messagemandatoryform_of_paymentmandatorychallenge_occurredoptionalsession_idoptionalstatusmandatoryorder_nooptionalreference_numberoptionalpayment_gateway_infooptional
In both cancelCallback and errorCallback, the SDK must be reinitialized, either on the same session or on a new session.
successCallback
In the Checkout SDK, the successCallback function is triggered upon the successful completion of the payment process.
Defining the successCallback Function
The successCallback function is defined and assigned as the value of the data-success attribute within the Checkout script tag.
Invocation of successCallback
When a payment is successfully processed, the successCallback function is invoked with a data JSON object, where data.status is set to success.
Params Available in data JSONObject for successCallback
messagemandatoryform_of_paymentmandatorychallenge_occurredoptionalsession_idoptionalstatusmandatoryorder_nooptionalreference_numberoptionalredirect_urloptionalpayment_gateway_infooptional
Examples
Basic Example
In order ViewController to be compliant to OttuDelegate, add the following functions to ViewController class:
func errorCallback(_ data: [String : Any]?) {
    navigationController?.popViewController(animated: true)
    let alert = UIAlertController(title: "Error", message: data?.debugDescription ?? "", preferredStyle: .alert)
    alert.addAction(UIAlertAction(title: "OK", style: .cancel))
    self.present(alert, animated: true)
}

func cancelCallback(_ data: [String : Any]?) {
    var message = ""

    if let paymentGatewayInfo = data?["payment_gateway_info"] as? [String : Any],
       let pgName = paymentGatewayInfo["pg_name"] as? String,
       pgName == "kpay" {
           message = paymentGatewayInfo["pg_response"].debugDescription
    } else {
        message = data?.debugDescription ?? ""
    }

    navigationController?.popViewController(animated: true)
    let alert = UIAlertController(title: "Canсel", message: message, preferredStyle: .alert)
    alert.addAction(UIAlertAction(title: "OK", style: .cancel))
    self.present(alert, animated: true)
}

func successCallback(_ data: [String : Any]?) {
    navigationController?.popViewController(animated: true)
    let alert = UIAlertController(title: "Success", message: data?.debugDescription ?? "", preferredStyle: .alert)
    alert.addAction(UIAlertAction(title: "OK", style: .cancel))
    present(alert, animated: true)
}
Callback behavior:
- Error → Displays an error alert and navigates back
- Cancel → Displays cancel reason (custom handling for
kpay) - Success → Displays success confirmation
This code describes callbacks to be handled by the parent app.
Full Example
There are both UIKit and SwiftUI samples available at the sample repo:
- UIKit: ottu-ios/Example at main · ottuco/ottu-ios
- SwiftUI: ottu-ios/Example_SwiftUI at main · ottuco/ottu-ios
The SDK initialization process and the callback delegate remain identical for both implementations.
Code Sample:
do {
  self.checkout =
    try Checkout(
      formsOfPayments: formsOfPayment,
      theme: theme,
      displaySettings: PaymentOptionsDisplaySettings(
        mode: paymentOptionsDisplayMode,
        visibleItemsCount: visibleItemsCount,
        defaultSelectedPgCode: defaultSelectedPgCode
      ),
      sessionId: sessionId,
      merchantId: merchantId,
      apiKey: apiKey,
      setupPreload: transactionDetailsPreload,
      delegate: self
    )
} catch
let error as LocalizedError {
  showFailAlert(error)
  return
} catch {
  print("Unexpected error: \(error)")
  return
}

if let paymentVC = self.checkout?.paymentViewController(),
  let paymentView = paymentVC.view {

    self.addChild(paymentVC)

    let resizableContainer = ResizableContainerView()
    resizableContainer.translatesAutoresizingMaskIntoConstraints = false
    resizableContainer.addSubview(paymentView)
    paymentVC.didMove(toParent: self)

    paymentView.translatesAutoresizingMaskIntoConstraints = false
    NSLayoutConstraint.activate([
    paymentView.topAnchor.constraint(equalTo: resizableContainer.topAnchor),
    paymentView.bottomAnchor.constraint(equalTo: resizableContainer.bottomAnchor),
    paymentView.leadingAnchor.constraint(equalTo: resizableContainer
        .leadingAnchor, constant: 16),
    paymentView.trailingAnchor.constraint(equalTo: resizableContainer
        .trailingAnchor, constant: -16)
  ])

    contentView.addSubview(resizableContainer)
    NSLayoutConstraint.activate([
    resizableContainer.topAnchor.constraint(equalTo: topLabel.bottomAnchor,
        constant: 16),
    resizableContainer.leadingAnchor.constraint(equalTo: contentView
        .leadingAnchor),
    resizableContainer.trailingAnchor.constraint(equalTo: contentView
        .trailingAnchor)
  ])

    resizableContainer.sizeChangedCallback = {
      [weak self] _ in
      guard
      let self
      else {
        return
      }
      updateScrollEnabled(
        for: scrollView)
    }

    let bottomLabel = UILabel()
    bottomLabel.text = "Some user UI elements"
    bottomLabel.translatesAutoresizingMaskIntoConstraints = false

    contentView.addSubview(bottomLabel)
    NSLayoutConstraint.activate([
    bottomLabel.topAnchor.constraint(equalTo: resizableContainer.bottomAnchor,
        constant: 16),
    bottomLabel.centerXAnchor.constraint(equalTo: contentView.centerXAnchor),
    bottomLabel.bottomAnchor.constraint(equalTo: contentView.bottomAnchor,
        constant: -16)
  ])
  }

// outside `viewDidLoad`
extension OttuPaymentsViewController: OttuDelegate {
  func errorCallback(_ data: [String: Any] ? ) {
    paymentContainerView.isHidden = true

    let alert = UIAlertController(title: "Error", message: data
      ?.debugDescription ?? "", preferredStyle:
      .alert)
    alert.addAction(UIAlertAction(title: "OK", style: .cancel))
    self.present(alert, animated: true)
  }

  func cancelCallback(_ data: [String: Any] ? ) {
    var message = ""

    if let paymentGatewayInfo = data ? ["payment_gateway_info"] as ? [
        String: Any],
      let pgName = paymentGatewayInfo["pg_name"] as ? String,
        pgName == "kpay" {
          message = paymentGatewayInfo["pg_response"].debugDescription
        } else {
          message = data?.debugDescription ?? ""
        }

    paymentContainerView.isHidden = true

    let alert = UIAlertController(title: "Canсel", message: message,
      preferredStyle: .alert)
    alert.addAction(UIAlertAction(title: "OK", style: .cancel))
    self.present(alert, animated: true)
  }

  func successCallback(_ data: [String: Any] ? ) {
    paymentContainerView.isHidden = true
    paymentSuccessfullLabel.isHidden = false

    let alert = UIAlertController(title: "Success", message: data
      ?.debugDescription ?? "", preferredStyle:
      .alert)
    alert.addAction(UIAlertAction(title: "OK", style: .cancel))
    present(alert, animated: true)
  }
}
Error Reporting & Security
Error Reporting
The SDK utilizes Sentry for error logging and reporting, which is initialized based on the configuration from SDK Studio. However, since the SDK is integrated into the merchant's app, conflicts may arise if the app also uses Sentry. To avoid this, merchants can disable Sentry in the Checkout SDK by setting the is_enabled flag to false in the configuration.
Jailbreak Detection
To enable the detection of jailbroken devices, the following section must be added to the application's Info.plist file:
<key > LSApplicationQueriesSchemes < /key>
    <array >
        <string > zbra < /string>
        <string > cydia < /string>
        <string > undecimus < /string>
        <string > sileo < /string>
        <string > filza < /string>
        <string > activator < /string>
    </array>
Screen Capture Prevention
The SDK implements screen capture restrictions to prevent the collection of sensitive data. This applies to fields containing Cardholder Data (CHD), such as the onsite checkout form for entering card details and the CVV field for tokenized payments.
This technique works in two ways:
- When attempting to take a screenshot of a protected screen, the fields appear empty, even if they contain input.
- When attempting to record a video of the screen, the video is completely blurred, making the content unreadable.